Making a CRT Video Wall Controller
Watch or read the vastly improved version of this article on the new website! nuvotion.live/tutorials/how-to-make-a-crt-video-wall-matrix
So, You Want to Build a CRT Wall?
I'm all about mixing the old with the new, and CRT TVs are my latest obsession. If you're like me, loving the glow of retro technology, then you'll get a kick out of this.
Here's how you can turn those vintage screens into an epic art installation:
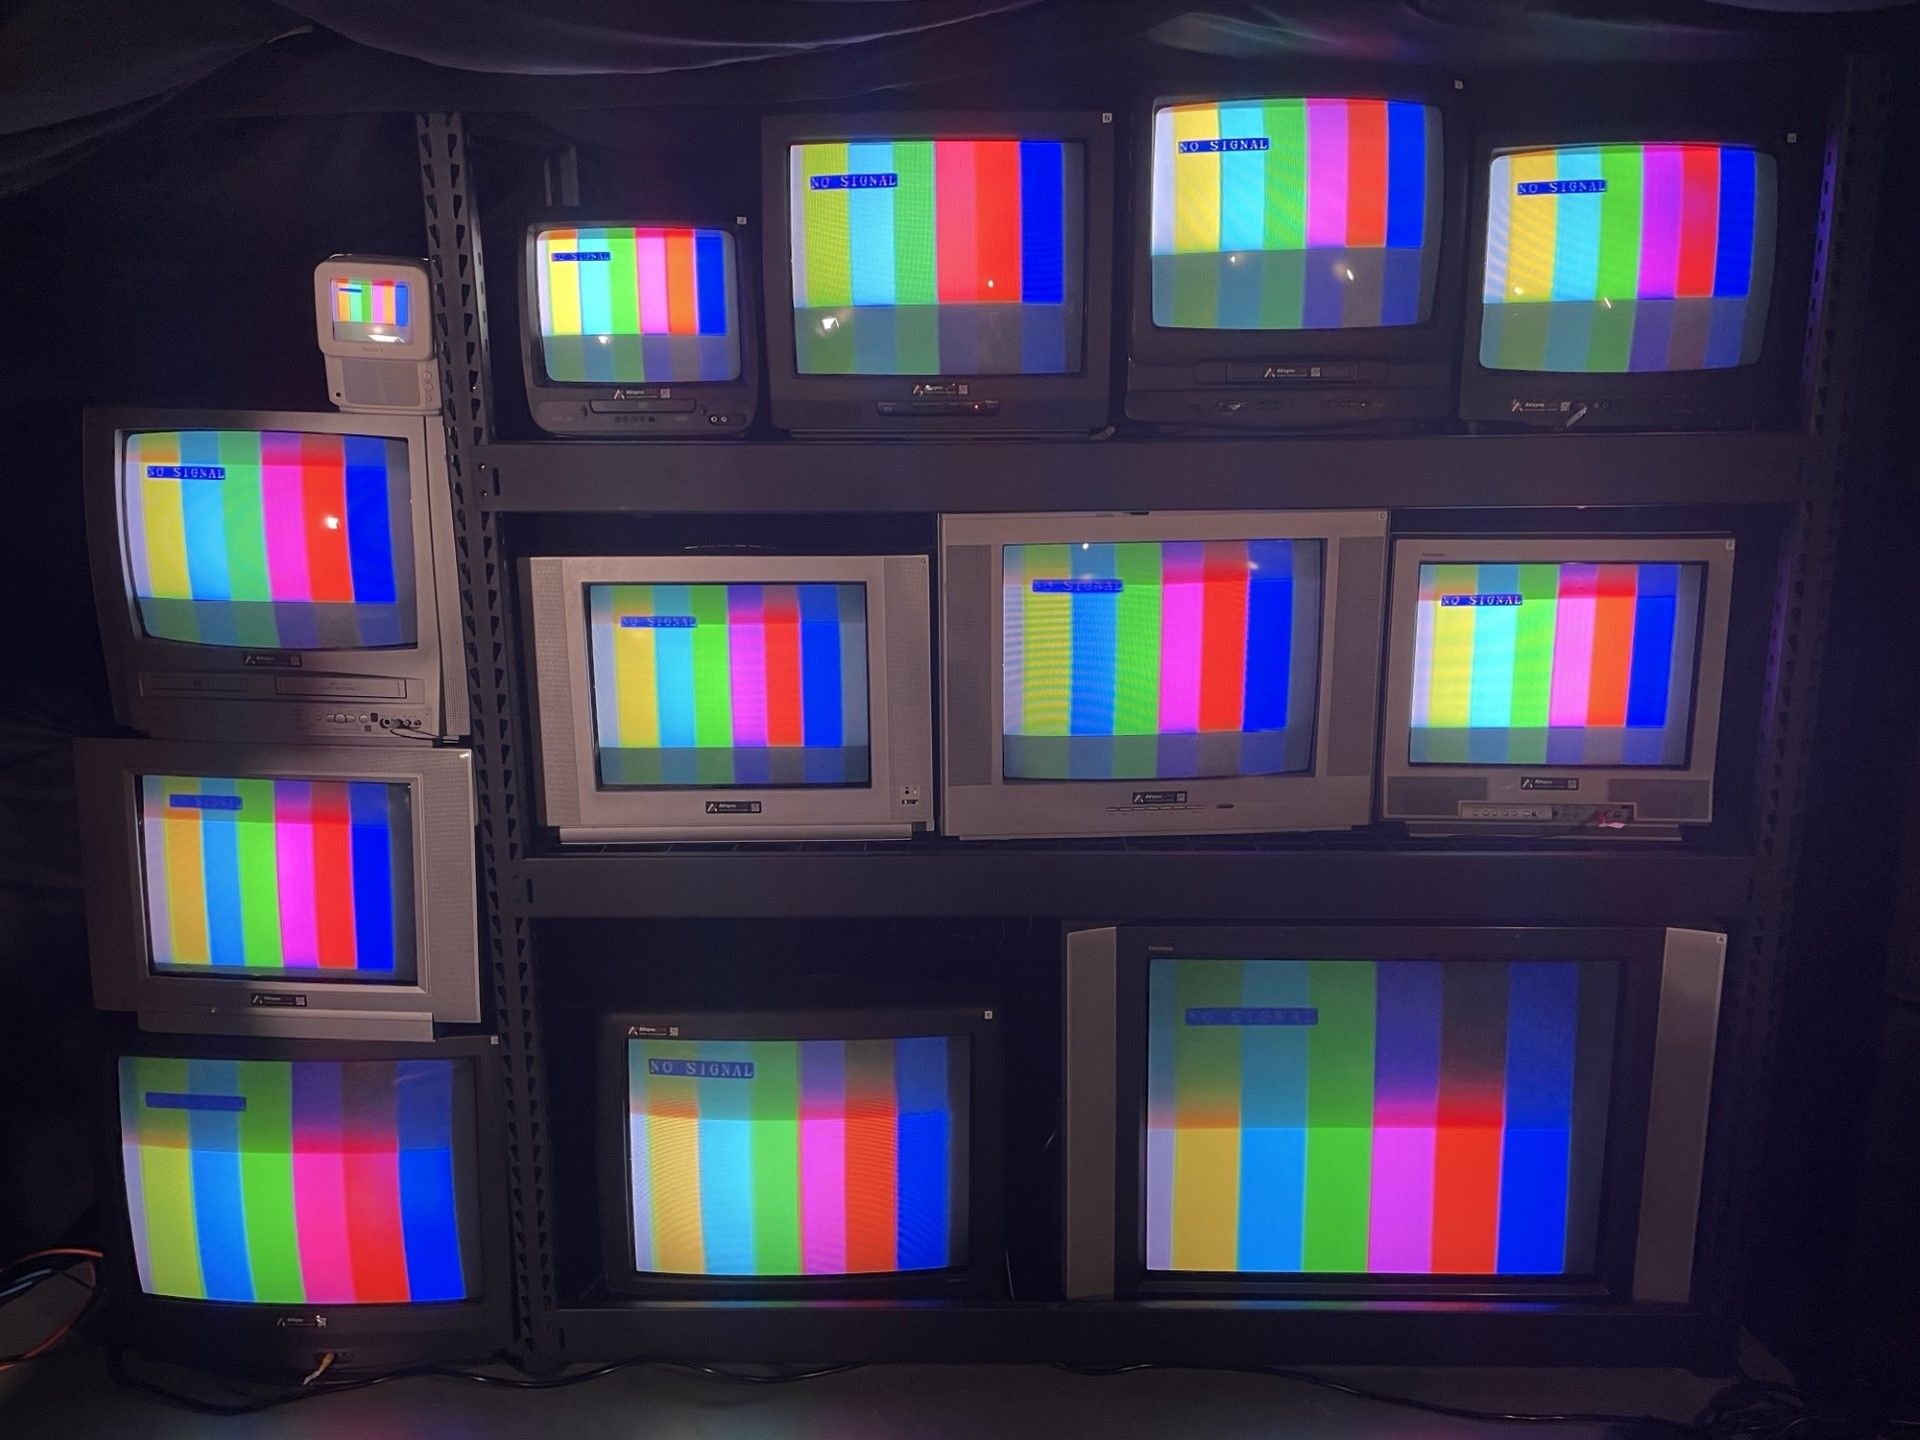
1. Construct the CRT Wall
Hunt down some CRT TVs – garage sales, Facebook Marketplace, you name it. Look for ones that have a (yellow) composite input.
Now, here's a pro tip: Grab some steel shelving designed for garage storage. Not only does it give you a sturdy multi-tiered wall, but it's also collapses flat for (relatively) easy transport.
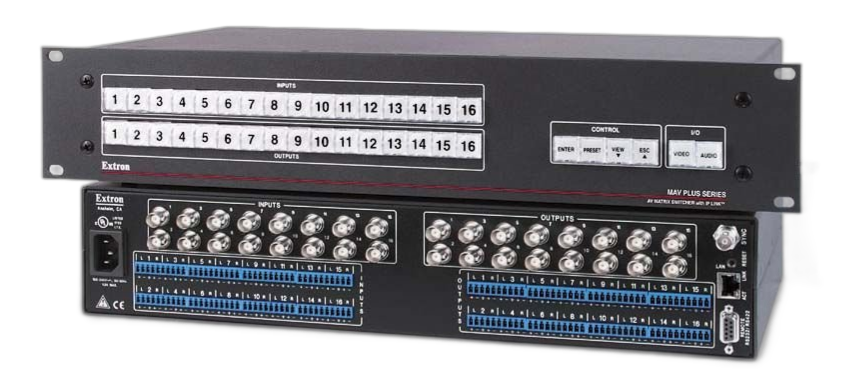
2. Hook Up the TVs to a Matrix Video Switcher
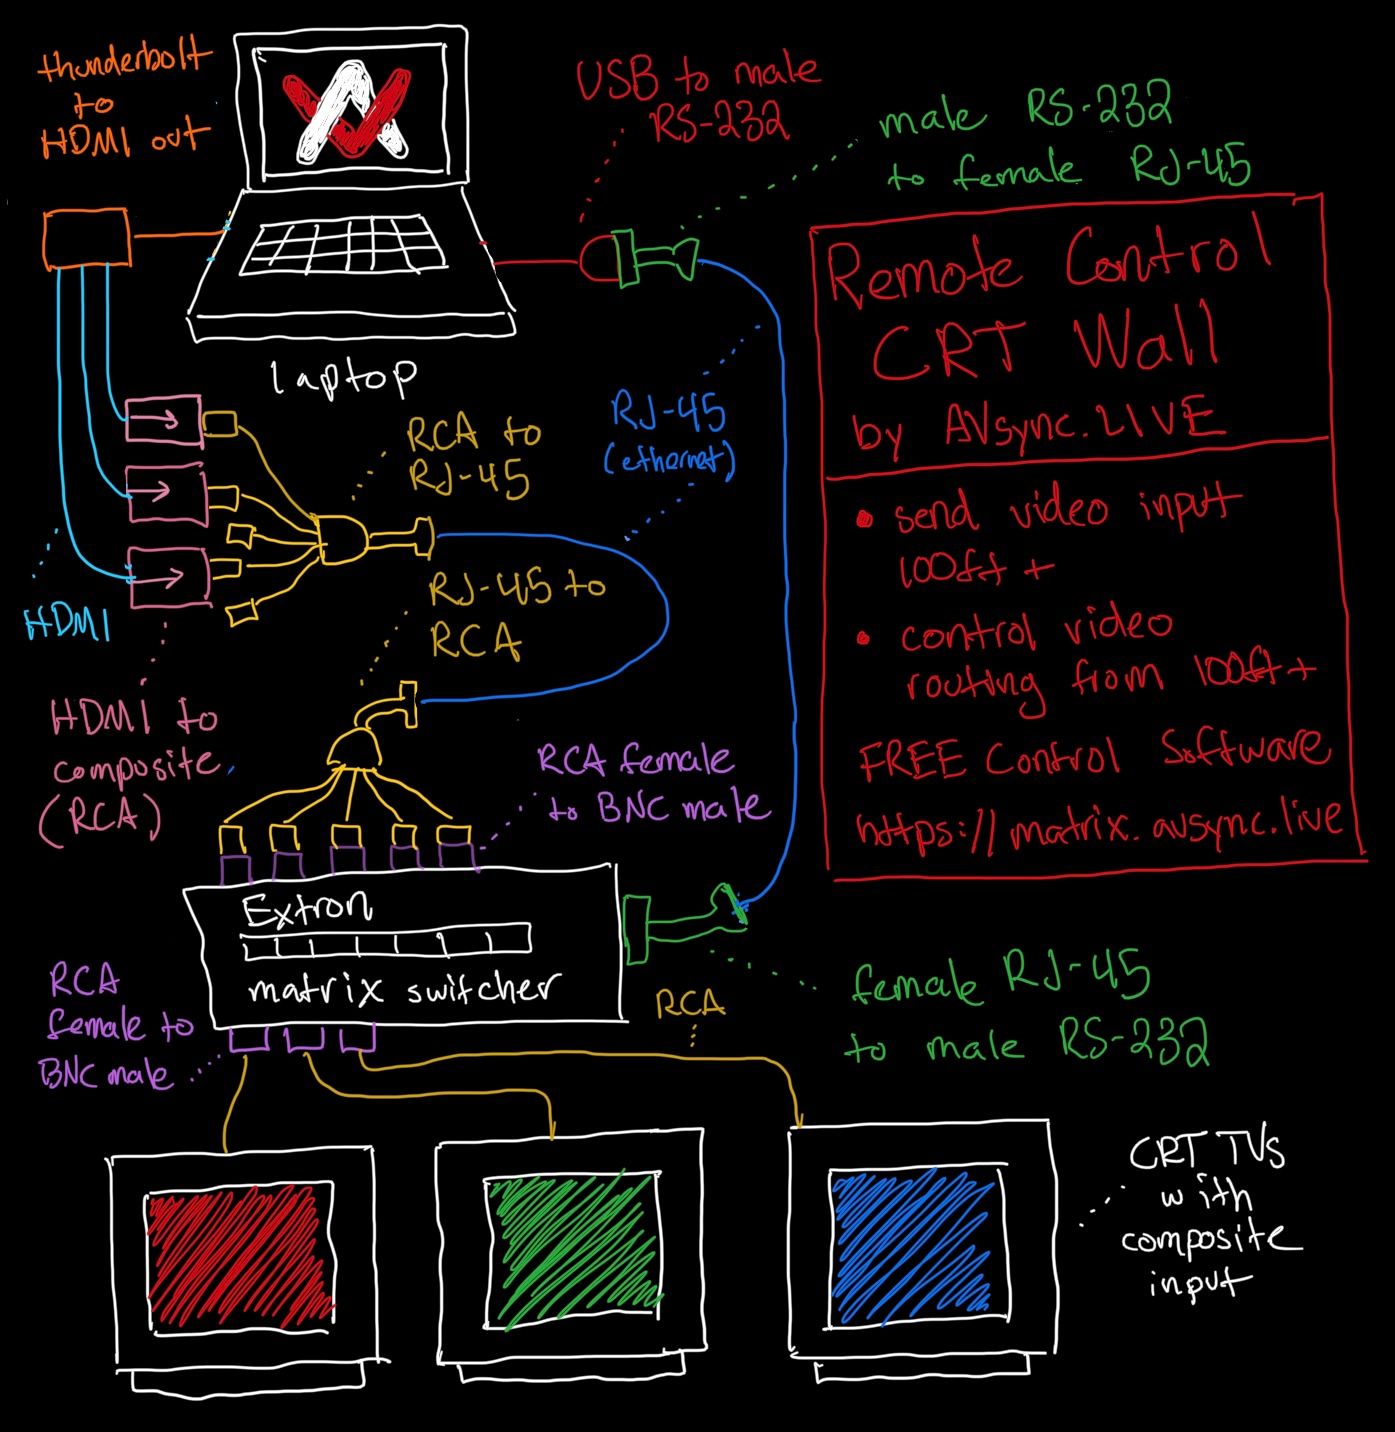
Connect all those beautiful CRTs to something like the Extron MAV, which are plentiful on eBay. Matrix switchers like these can route any video input to any output. It's basically an all-in-one switcher and splitter.
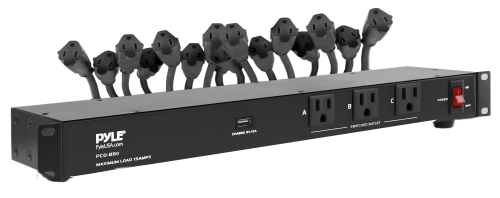
Like I do in the video, you also might want to build a portable case for your matrix switcher that also includes a power conditioner, so that you can easily power your array of CRTs.
3. Get that Matrix Switcher Talking to Your Computer
A USB to RS232 adapter does the trick. It's the bridge between your computer and that wall of vintage tech goodness.

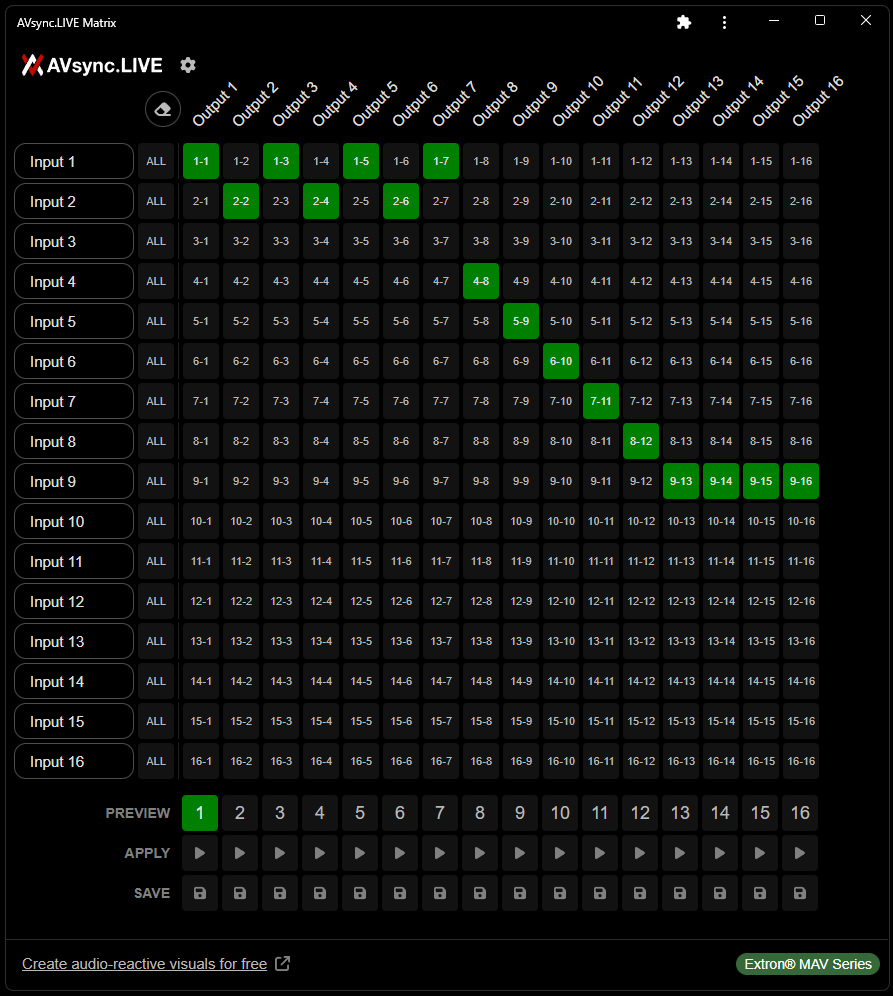
4. Time to Play with AVsync.LIVE Matrix
AVsync.LIVE Matrix is the remote control for the whole setup. Just connect your computer to the matrix switcher using the USB to RS232 adapter.
Save and play around with presets, and become the master of your video routing with a few keyboard taps. It's free to use, and doesn't even require a download.
Infographic
To understand how it all fits together, study this infographic. Using this setup, you can send multiple outputs and control the video routing patterns of the TVs from one computer. And with the ethernet adapters, you can send those signals 100ft+.
Some Handy Tips
1. Control from Your Comfy Chair
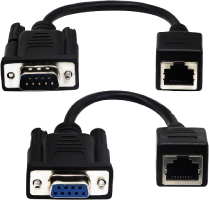
- Serial-over-CAT5 lets you control your matrix from 50ft+ away. Just link them with a standard ethernet cable.
- Send up to 5 channels of composite video that same distance with component-over-CAT5. Ignore the colors, you can still use each RCA to send composite video.

2. Turn Up the Cool Factor with AVsync.LIVE
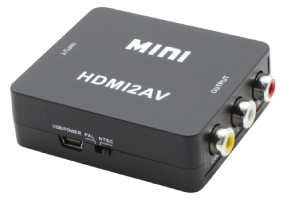
- Use an HDMI to composite converter to send audio-reactive visuals from AVsync to your matrix.
- Open several AVsync.LIVE windows for different outputs to each input of the matrix.
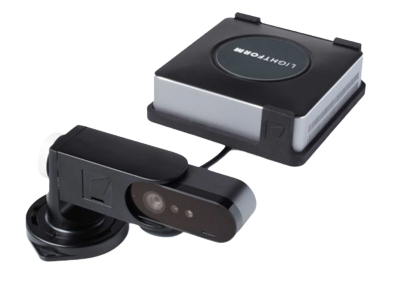
3. Projection Mapping the CRT Wall with Lightform
- Although Lightform is out of business, you can still snag units on eBay. These tools can take your CRT wall to another dimension with projection mapping. They'll usually cost you between $700 and $1000, but it's a game-changer for visual creativity.
If you're not convinced it's worth it, I invite you to watch this video to change your mind.
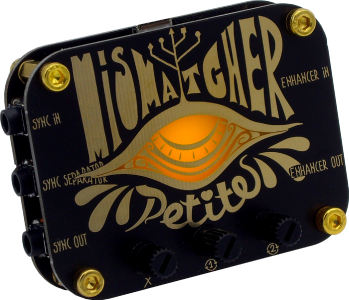
4. Add Some Glitchy Texture with Modern Gear
- For that authentic glitch feel, check out Schele Mixer 2b or Freedom Enterprises Mismatcher Petite.
- This modern hardware lovingly hand crafted by glitch enthusiasts, and sure to be the start of a spiraling, feedbacking, years-long rabbit hole for you.
Parts List
- 6+ CRTs
- Steel Shelving
- Extron MAV 1616 S-Video Matrix Switcher
- Pyle Pro 16-Output Rackmount Surge Protector
- Rockville RRB50 5U Rack Bag Double Sided Case
- Male BNC to Female RCA Adapters (don't forget!)
- RCA Video Cords (6ft+ Recommended)
- USB to RS-232 Adapter
- RS232-over-ethernet adapters
- Component-over-ethernet adapters
- HDMI to Composite
- Lightform LFC
- Glitch mixers
Total damage: $250-1500
Let's Wrap This Up
So there you have it. A step-by-step guide to building your very own wall of retro-futuristic nostalgia. Have fun with it, experiment, and prove to your friends it's not all just about 4K. Let's keep the CRT love alive! Please message me on Instagram if you have any questions.